
📝 Backing up your blog’s template is essential—whether you’re trying out a new design, editing code, or making major changes. But what if something goes wrong? 😰
Good news: restoring your blog’s original template is just as simple as backing it up! Below are two easy methods to bring your blog back to its original form.
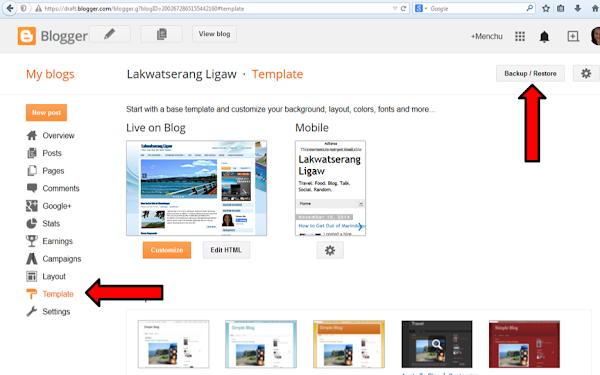
✅ Method 1: Restore Using the Backup File
This is the quickest and easiest way to restore your blog template.
🛠️ Steps:
2. Navigate to Template → Backup/Restore


🎉 That’s it! Your blog’s original template will now be restored.
🧑💻 Method 2: Restore via HTML Copy-Paste
If you prefer manual control or your upload option isn’t working, you can also restore your blog using a copy-paste method.
🛠️ Steps:


🔁 Your blog template will now be replaced with the original version you backed up.
💡 Tips to Remember
🗂️ Always back up
before making any major changes
📝
Rename your backup files by date or description so you can identify them easily
💻
Use Notepad++ or XML editors for easier readability when editing manually
☁️
Save a copy of your backup in Google Drive or Dropbox for extra security
📣 Found this tutorial helpful?
✨ Don’t keep it to yourself—share this post with fellow bloggers and save someone from a template disaster!
No comments:
Post a Comment
Thank you for reading! Please share and like my Facebook page :)