
Have you ever spent hours replacing and formatting the same word again and again in your blog post or Word file?
Yeah, I’ve been there too. For the longest time, I did it manually—search, replace, format… repeat. It was tedious, time-consuming, and honestly? Super tiring.
Then one day, I thought—there has to be a better way. So I explored, experimented, and finally figured out how to replace and format words automatically in Microsoft Word. And yes—it works like magic! ✨
Let me share with you this simple method that saved me hours of editing.
🛠️ Step-by-Step Guide to Replace & Format Words in Word
📄 Step 1: Paste Your Text into Word
Copy all the content from your blog, notepad, or wherever you’re working, and paste it into a Word Document.
🔍 Step 2: Open the Find and Replace Window
You can do this in 3 different ways:
- Press Ctrl + G, then click on the Replace tab

- Or press Ctrl + F, then click the arrow beside the magnifying glass → choose Replace

- Or click Find/Replace directly on the Home Menu bar (far right)

✏️ Step 3: Enter the Words
- In the "Find what" box: type the word you want to replace
- In the "Replace with" box: type the new word
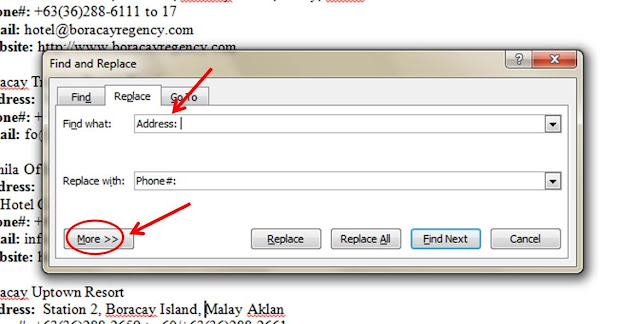
Then click More >> to expand the formatting options.
Important Tip: ✅ Click inside the "Replace with" box before formatting, or your changes will apply to the original word instead!
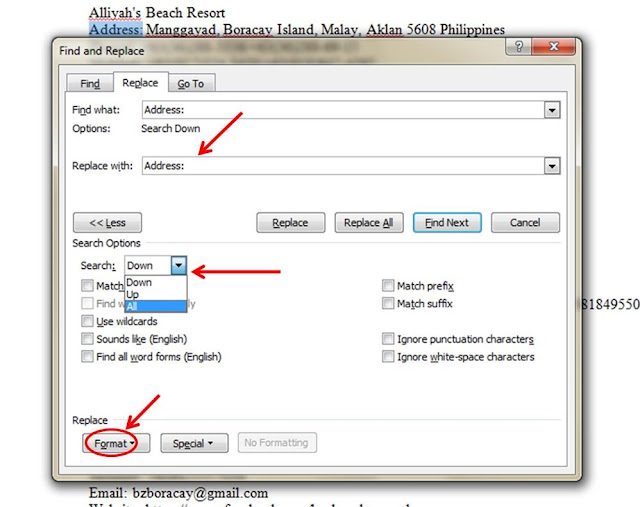
🎨 Step 4: Apply Formatting to the Replacement Word
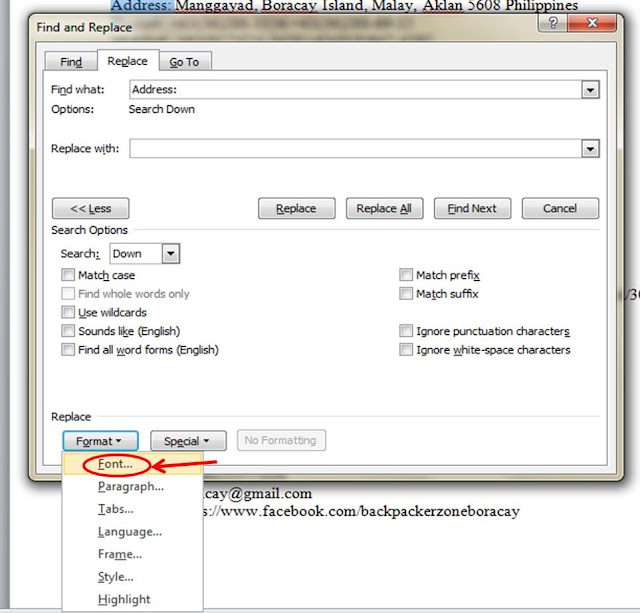
- Click Format (at the bottom of the window)
- Choose Font, Paragraph, or other formatting options
- For example, if you want to bold the replacement word, go to Font → check Bold, then click OK
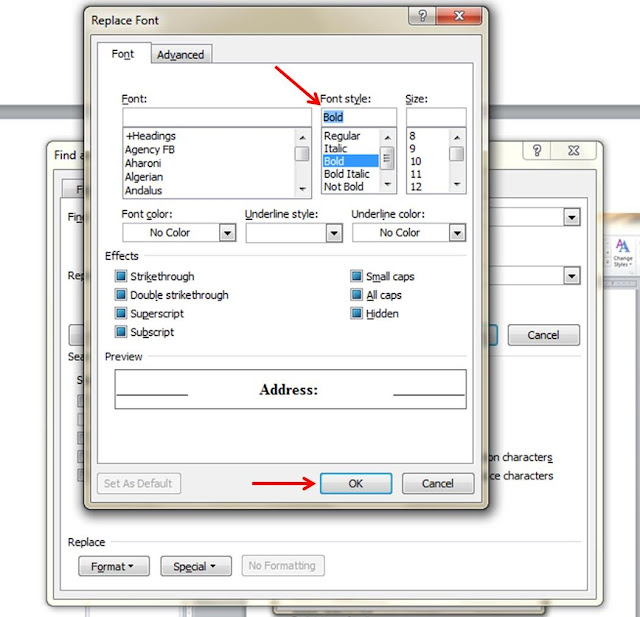
You’ll now see a summary of your formatting changes right below the "Replace with" box.
🔁 Step 5: Replace All

Once you’re satisfied:
- Click Replace All
- A prompt will confirm how many changes were made
- Click OK, then close the Find and Replace window
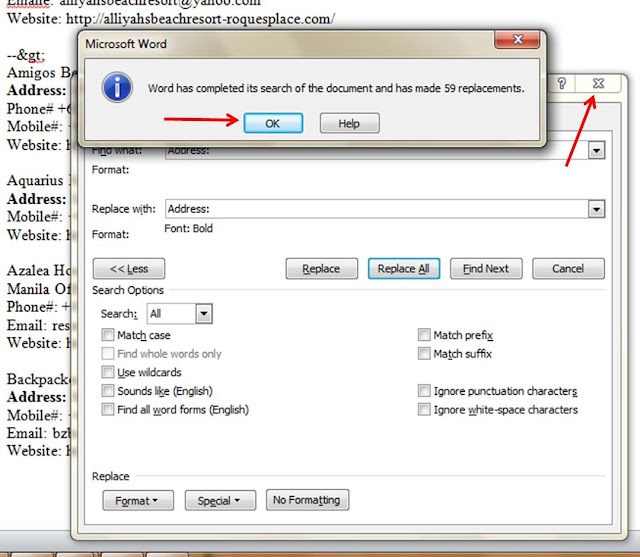
🎉 Success! All your chosen words are now replaced and formatted—instantly.
📌 Real-Life Example
In my case, I replaced the word “Address” across my entire document and made each instance bold. What used to take me 15+ minutes now takes seconds.


It’s a total game-changer, especially if you're editing long blog posts or eBooks where formatting consistency matters.
💡 Pro Tips
🧠 Use this when:
- You need to update branded terms or headings
- You want to emphasize keywords in your content
- You’re editing long documents like eBooks, guides, or legal templates
☁️ Bonus Tip: Save a copy of your edited file before running Replace All—just in case!
📣 This little Word Document trick is one of those things I wish I had known sooner. Whether you’re a blogger, writer, VA, or student—this hack will save you time, energy, and headaches.
If this helped you, don’t forget to like, comment, or share it with a friend who might need it too. Let’s make formatting life easier for everyone!
💡 Save time and stress—try this Word Document trick today and never replace words one by one again!


.png)


0 Comments:
Post a Comment
Thank you for reading! Please share and like my Facebook page :)