 |
| “Conquer the Parrot’s Beak – One Step at a Time” |

Mt. Pico de Loro, also known as Mt. Palay-Palay, is a dormant volcano straddling Cavite and Batangas. Popular among hikers and adventure-seekers, the mountain gets its name from the phrase "Beak of a Parrot," thanks to the striking silhouette of its summit and monolith when photographed just right. It is both intimidating and mesmerizing. It’s a favorite for beginners and seasoned hikers alike.
This inactive and ancient volcano stands at 2,178 feet (664 meters) above sea level and features a dramatic 60-meter monolith—a natural rock formation that many hikers dream of climbing. If you're looking for an extreme adventure, this is the challenge for you!
⛰️
Elevation: ~664 MASL (meters above sea level)
🥾
Difficulty: Moderate (4/9)
🕒
Average hike time: 3–5 hours to summit, 2–3 hours down

This hike was a spur-of-the-moment decision. My friend received a tour package offer of ₱1,900 for a day climb, but I suggested we do it ourselves. That way, we could save money and control our time, maybe even squeeze in a few side trips.


I’ve done a 5-hour cave connection in Sagada and a 2.5-hour Mt. Pinatubo trek, so I thought Pico de Loro’s 3-hour climb would be a breeze. Spoiler alert: I was wrong.
We left Manila at 5:00 AM and arrived at the DENR registration area by 7:04 AM. There were already a lot of hikers preparing for the trek. There weren’t any signs showing where to register, but the local vendors were helpful.
Tip: Bring enough snacks and water. There are no stores or toilets on the trail, so make sure to use the restroom before starting.

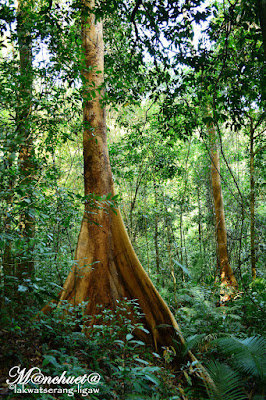
The new trail (they’ve closed the old one) lacks official signs, but there are handwritten directions on cardboard and red ribbons tied to trees. The path isn’t easy and definitely not for the faint-hearted or those with knee issues. The cool weather and shaded trees were the only saving grace.


After 2 hours and 7 minutes, we reached the campsite—faster than the estimated 3 hours. I was tired, but the views were spectacular. I didn't waste any time and headed straight to the viewpoint.


After snapping tons of photos, we set our sights on the summit. I asked two teenagers for directions, not knowing they were guides. They ended up showing us the way.


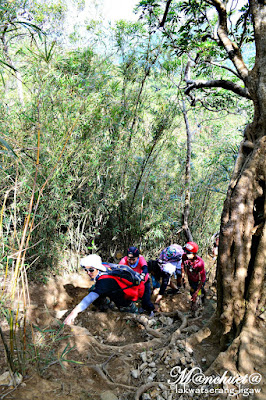
Climbing to the summit was scarier than I expected. Initially, you can hold onto roots and trees, but halfway through, there’s nothing to grip. I crawled up, too scared to look down. One misstep and, well... let’s not think about that.


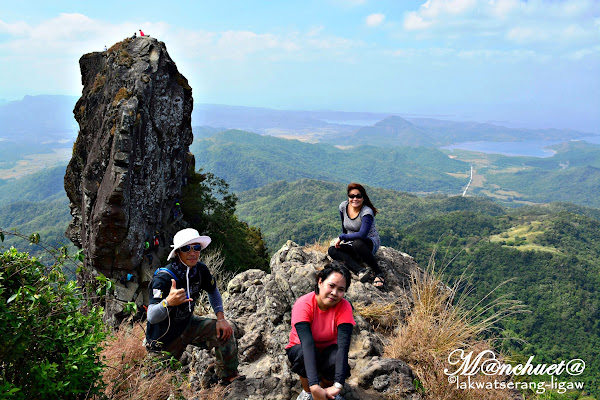
Before the hike, my friend asked if I wanted to climb the monolith. I confidently said yes. But when I saw it up close from the summit, I froze. It looked impossible.


As I watched people struggle using a rope and a single
harness, I got cold feet. But I didn’t want to go home with regrets.


But reaching the top? Absolutely worth it. The pride, the view, the thrill—priceless.


While waiting at the monolith, I spotted a trail below. A guide told me it was a traverse route to Nasugbu, Batangas. Remembering how tough it would be to descend the summit the same way, we decided to take this trail.
Bad idea? Maybe. It was steeper, more tiring, and we barely saw other hikers. I kept asking every guide we passed how much farther we had to go.


- Hire a Tour Guide if you're planning to climb the monolith. They provide their own rope and harness. You won't be allowed to climb without one unless you bring your own.
- Bring enough water and snacks before starting the trail. There are no stores until you reach the campsite.
- Use the restroom at the drop-off point. No toilets on the trail, but trees can be your friend in an emergency!
- Pack your own lunch to save money. The campsite has food stalls, but prices are high due to the difficulty of transporting goods.
- Bring a hat with a strap—umbrellas won’t work because of strong winds.
Click the links below for more info:
- 💵 Registration fee: ₱200/person at the DENR station
- 🧭 Guide: Optional but recommended (₱1,000–₱1,500 for up to 5 people)
- 🕙 Climb cut-off: 10:00 AM (be early!)
⚠️ Solo hiker tip: You can join other hikers to split guide fees — just ask around at the jump-off.
If you’re heading back via Nasugbu, stop by Mahogany Market in Tagaytay for a hearty meal.
- Bulalo – ₱350 (Good for 2–3)
- Crispy Tawilis – ₱650 (Good for 8) – Tip: Order the smaller serving!


- Forested trail, some light inclines
- Great way to warm up and enjoy the shade
🪨 Base Camp to Summit
(Moderate)
- Steeper ascents, dirt and rock trails
- Gorgeous views start opening up
🐦 The Parrot’s Beak (Monolith) (Challenging)
- Optional final climb — requires rope, guts, and caution
- Highly recommended for thrill-seekers, but closed during wet or windy conditions
📸 At the summit, you’ll see rolling hills, the South China Sea, and if you're lucky, clouds hugging the horizon.
- 2–3L of water (no refill stations!)
- Packed lunch/snacks (trail mix, sandwiches, banana)
- Sunscreen & hat
- Extra shirt & small towel
- Lightweight rain jacket (weather can change fast)
- Basic first aid kit
- Trekking pole (optional, but helpful for steep descents)
- Garbage bag — Leave No Trace!
This climb was the highlight of my 2015. It challenged my fear of heights and proved that I can push myself beyond limits. If you’re thinking about climbing Mt. Pico de Loro—do it. Don’t let fear or hesitation stop you. You’ll be amazed at what you’re capable of once you reach the top.


.png)


0 Comments:
Post a Comment
Thank you for reading! Please share and like my Facebook page :)